Let’s work with Azure Functions and Create our 1st Function
To Setup your enviroment you need:
- VSCODE Installed
- Azure Functions Installed (extension)
- Powershell Core
- NET SDK 2.2
- Azure Functions Core Tools
Goal – Build a REST API and simple web page to display the information using powershell and Azure Functions
Do it in DevOps Way (not via GUI)
Yes, it’s easy to create a repository in Azure DevOps or GitHub and deploy azure functions at ease. For our demo I used Azure DevOps.
Create a GitHub repo (blank) on github.nike.com and give it the name iTrackv2 (my case) you can use the name you want and then follow the directions below:
On your VSCODE enviroment I used AzureRM Module – you can choose what you feel confortable with (CLI , Az Module ..)
- git clone ‘<url> of your repo’
- I had to fix a little issue here with the Github Token basically if you don’t have a token create one otherwise cloning the repo will complain.
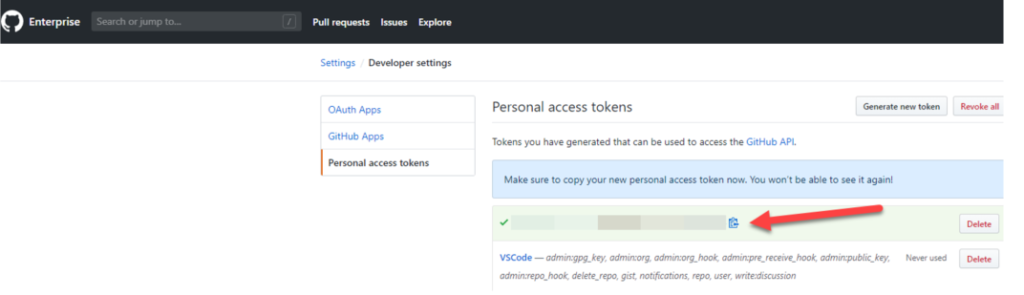
- Use your token in the following way git clone https://<token>@github.com/owner/repo.git
- Go to your Project folder = CD .\YourFolder
- You will see an empty Repo with a readme.md
Create the Azure Funtion
- In our case Worker Runtime will be Powershell
- func init –worker-runtime powershell
- Now let’s create the function
- func new –name ADPDCTASKS –template HTTPTrigger
- ADPDCTASKS is the name I would like to give to my Function you can change that to your desired name.
- This will create (2) files (function.json and run.ps1)
- Basically we need another script here to provide us the JSON file I will provide the one I am working on as example, everything can be converted to JSON, I am pulling an AD feed and converting to JSON looking out for specific fields in AD , I think this can also give you a overview on how you could use this for other functions you might want.
- On your Terminal – mkdir database
- Copy the following JSON file(employees) into the folder
- This file must be renamed to employees.json , its a sample file with fictitious employees (download below)
For our test Function to work we need to replace the run.ps1 code
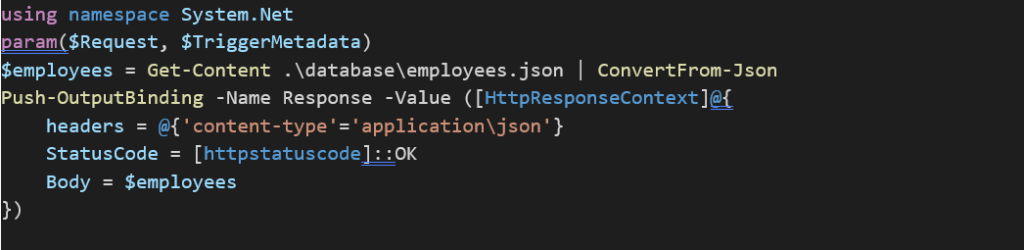
using namespace System.Net

param($Request, $TriggerMetadata)

$employees = Get-Content .\database\employees.json | ConvertFrom-Json

Push-OutputBinding -Name Response -Value ([HttpResponseContext]@{

    headers = @{'content-type'='application\json'}

    StatusCode = [httpstatuscode]::OK

    Body = $employees

})
Let’s test the REST API endpoint
- Now, test your REST API endpoint which is #serverless using func host start
- Open the Terminal (click on the Terminal TAB)
- Type – func host start you should see something like below
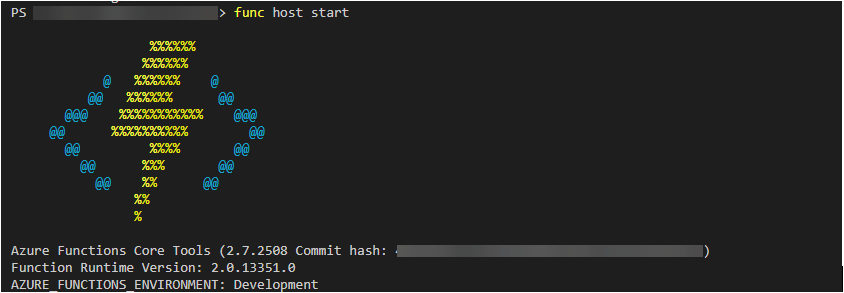
- will see the API URL like below

- On your Terminal type – $employees = Invoke-RestMethod -Uri “http://localhost:7071/api/ ADPDCTASKS ” (pay attention to the name of the Function App you gave)
- Type – $employees (to display the data) hosted on your JSON DB
- Congrats this was your first Azure Function and its working.
- CTRL+C to break the code since it’s a lot of info and let’s work a way to display this in a better format.
How to present this data with a simple PSHTML page.
- Create a Folder – mkdir Modules
- Save this module – Save-Module -Name PSHTML -Path .\Modules
- Create a new Function – func new –name ListEmployees –template HTTPTrigger (If you want to give another name to the Function you already know 😊)
- Again this will create (2) files (function.json and run.ps1)
- Replace the run.ps1 with the following code
using namespace System.Net

param($Request, $TriggerMetadata)

$body = html -Content {

    head -Content {

        Title -Content "Name your Page - Employee Data or Something"

        Link -href 'https://maxcdn.bootstrapcdn.com/bootstrap/4.0.0/css/bootstrap.min.css' -rel stylesheet

        script -src 'https://code.jquery.com/jquery-3.2.1.slim.min.js'

        script -src 'https://cdnjs.cloudflare.com/ajax/libs/popper.js/1.12.9/umd/popper.min.js'

        script -src 'https://maxcdn.bootstrapcdn.com/bootstrap/4.0.0/js/bootstrap.min.js'

    }

    Body -Content {

        Div -Class 'container' -Content {

            Div -Class 'jumbotron' -Content {

                H1 -Class 'display-4' -Content "
Name your Page - Employee Data or Something"

            }

        }

        Div -Class 'container' -Content {

            $employees = Get-Content .\database\employees.json | ConvertFrom-Json

            Table -class 'table' -Content {

                Thead -Content {

                    th -Content "EmployeeID"

                    th -Content "GivenName"

                    th -Content "Surname"

                    th -Content "Building Reference"

                    th -Content "Floor"

                    th -Content "Area"

                    th -Content "Desk"

                    th -Content "Special Instructions"

                    th -Content "Mail"

                    th -Content "Notification Type"

                    th -Content "OfficePhone"

                }

                Tbody -Content {

                    foreach ($employee in $employees)

                    {

                        tr -Content {

                        td -Content $employee.EmployeeID

                        td -Content $employee.GivenName

                        td -Content $employee.Surname

                        td -Content $employee.'physicalDeliveryOfficeName'

                        td -Content $employee.Floor

                        td -Content $employee.Area

                        td -Content $employee.Desk

                        td -Content $employee.'Special Instructions' =""

                        td -Content $employee.Mail

                        td -Content $employee.'Notification Type' = "Special"

                        td -Content $employee.OfficePhone

                        }

                    }

                }

            }

        }

    }

}

# Associate values to output bindings by calling 'Push-OutputBinding'.

Push-OutputBinding -Name Response -Value ([HttpResponseContext]@{

        headers    = @{'content-type' = 'text/html' }

        StatusCode = [httpstatuscode]::OK

        Body       = $body

})- Now you can see (2) functions running

- Open your browser and head to http://localhost:7071/api/ListEmployees (pay attention to the name of the Function App you gave)
- You should have a list of employees available, now this was your first function there is many ways to automate this “feed” and deliver live reports or changes its just adjust for what you need !
See you soon , enjoy =)


0 Comments